.svg)


Whether you made a mistake, want to roll back a design change, or simply need peace of mind, Webflow’s backup and restore feature is a lifesaver. Webflow automatically creates save points as you build, and also gives you the power to manually create backups. In this guide, we’ll walk you through exactly how to access, preview, and restore a backup of your Webflow site — plus a few tips on how backups work behind the scenes.
✅ Restoring a Webflow Backup Made Simple
STEP 1:
To access your site backups, start by clicking on Settings at the bottom of the left-hand sidebar.

STEP 2:
In the Settings panel, click on Backups to view your saved site versions.

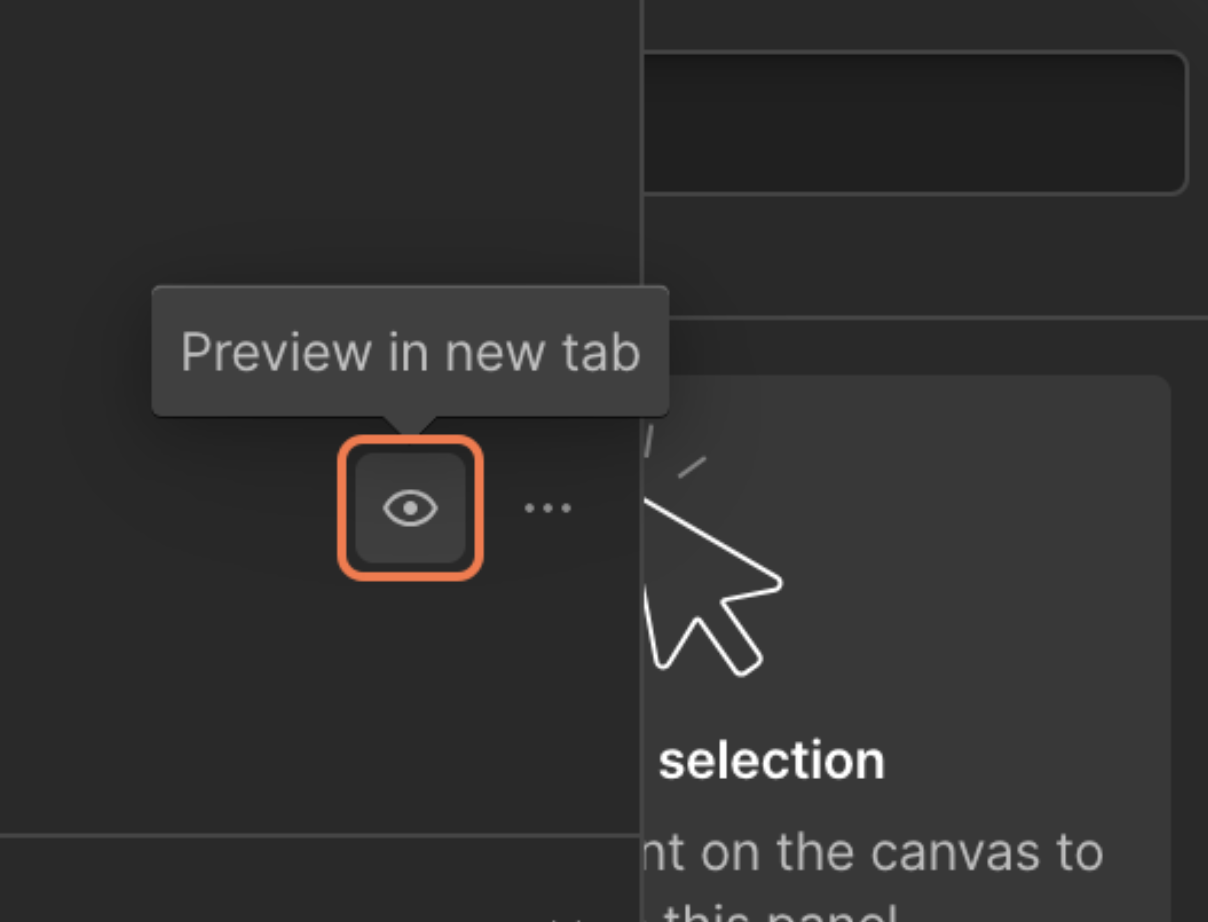
STEP 3:
Review the available backup options, then click the Preview Backup icon to view a saved version of your site before restoring it.
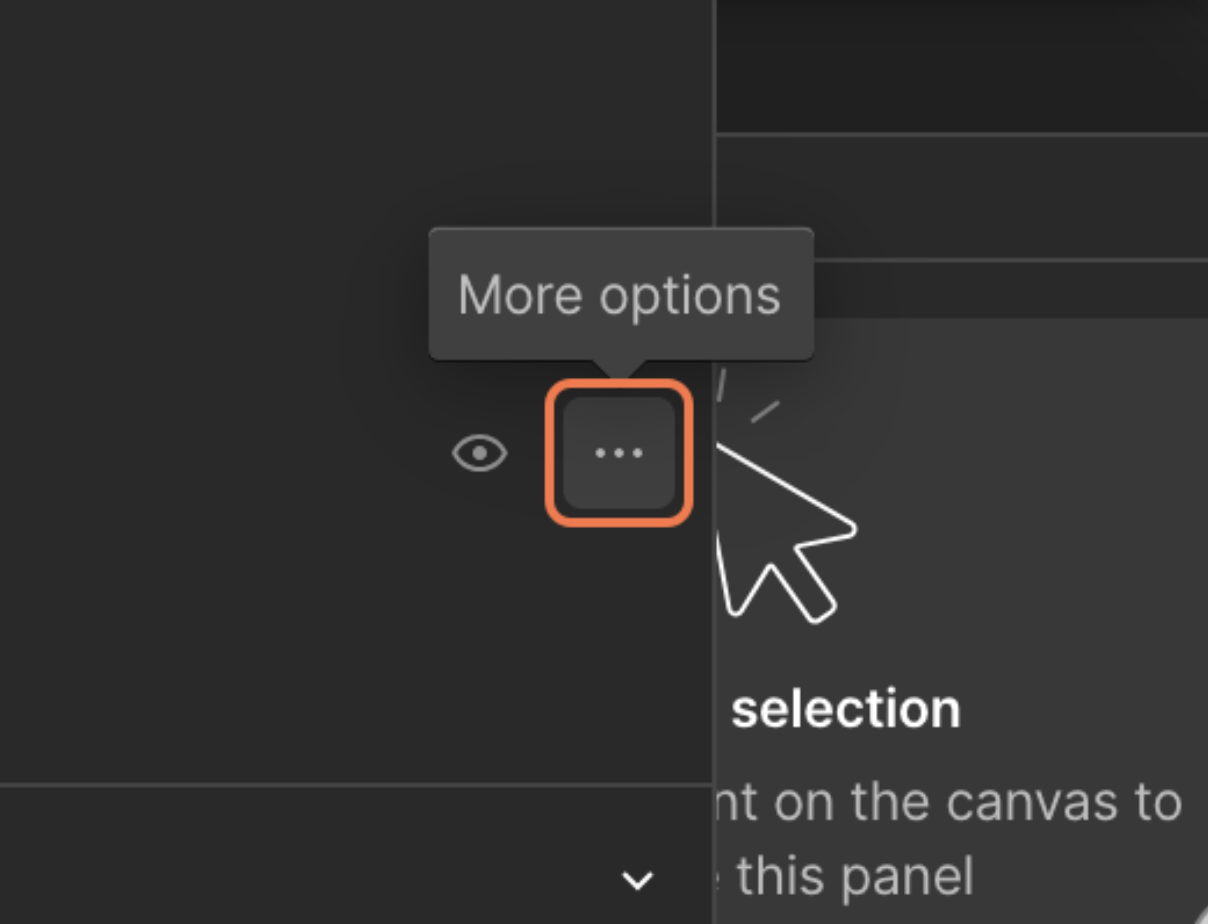
STEP 4:
Click on the More Options icon (three dots) next to the backup you want to restore.
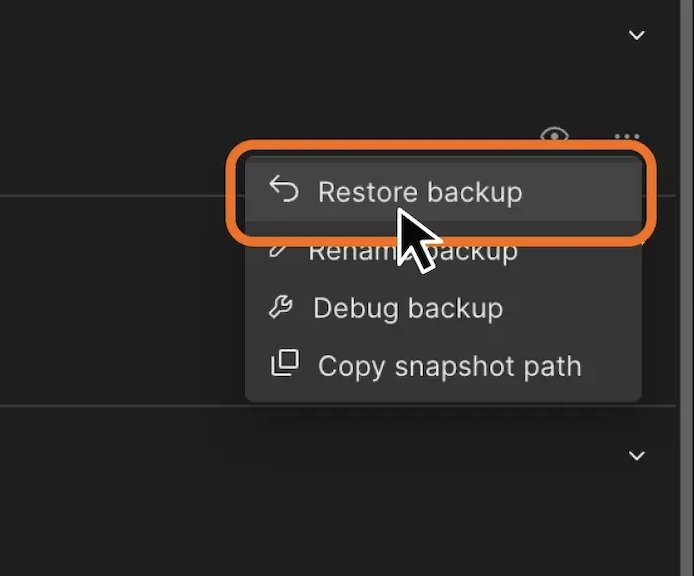
STEP 5:
Click on Restore Backup to revert your site to the selected saved version.
STEP 6: Backup Successfully Restored
You’ve now successfully reverted your Webflow site to a previously saved version. Your site will reflect the exact state it was in at the time of that backup — all without affecting your live domain until you choose to publish.

💡 Tip: After restoring, preview your site and test key pages before publishing to make sure everything looks as expected.
💾 Want More Control Over Your Webflow Saves?
Now that you know how to restore a backup, let’s take a quick look at how Webflow handles backups behind the scenes — including auto-saves, manual saves, and restore points you might not even know exist.
Webflow automatically saves your progress as you work — indicated by the green checkmark in the top toolbar. But beyond that, it also offers options to manually save backups and auto-generates restore points at key moments.
- Automatic Saving:
Webflow autosaves frequently. You'll see a green checkmark when your changes are up-to-date.
- Manual Backups:
Use Command + Shift + S (Mac) or Control + Shift + S (Windows) to manually create a backup with a custom description. This gives you more control when reverting changes.
- Restore Points:
Webflow automatically creates restore points every 50 autosaves, and whenever you restore to a previous version — so you always have a safety net, even if you forget to manually save.
Backups in Webflow are simple, fast, and reliable — but knowing how to use them properly can save you hours of stress. Whether you want to experiment freely or protect yourself from accidental edits, learning to manage backups gives you full control over your site’s history. Bookmark this guide, and you’ll always have a way to roll back with confidence.


.jpeg)


